Instagram: Makeamark_artroom

Monday, December 5, 2016

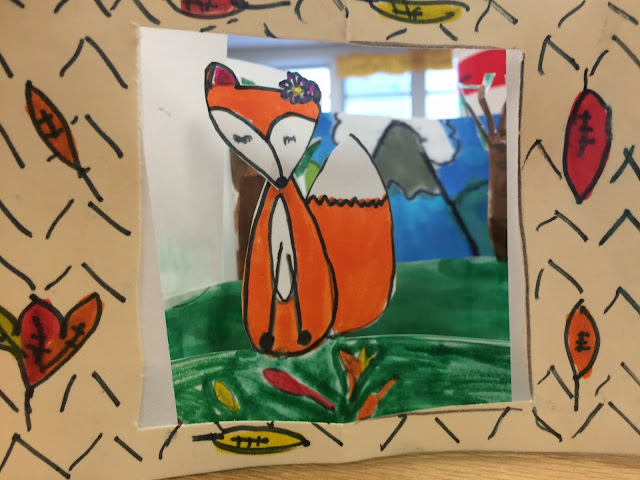
Epic Tunnel Book Landscapes


Wow, this project was, well....enduring.

It began with our landscape unit of study. I wanted to offer my students a unique creative experience so I had researched ways to create 3D landscapes. My students really love creating 3D (not surprising, it is my favorite too...I really passionate about it). This art making endeavor ended up taking us 6 - 8 classes to complete, from introduction to final rubric assessments.


About 4 classes in, I asked my classes if they were still excited about working on their tunnel books and by and large, everyone was still invested. I was surprised and pleased!

I  am going to try and keep this succinct because I could write essays about the process, and I will, since I'm using this unit for my National Boards portfolio.

Our learning objectives were:
  1.   Create: I created a tunnel book landscape that has background, middle ground, and foreground layers with a horizon.

  2.  Engage & Persist: I developed a clear visual story within my landscape.
  3.  Planning: I considered and tried out a few ideas before and during my art making.
  4.   Develop Craft: I applied new art making methods/techniques as well made connections to my other artwork/experiences. (ex. tunnel book construction, watercolor painting, collage)
Our lesson sequence was:
  • Day 1 - Introduction to key vocabulary with visual examples in art history (google slides), created sketches, and assessed comprehension of landscape vocabulary 
  • Day 2 - Examined our sketches, planned for construction, introduction to construction
  • Day 3 - Created a background for the tunnel book
  • Day 4 - Created and assembled middle ground sections with accordion sides
  • Day 5 - Created foreground and attached viewfinder - assessed works in progress
  • Day 6/7 - Finalized construction, peer reviews
  • Day 8 - Self assessed with co-written rubric (teacher + student input)
 Here are some more the results. I didn't take many process photos because I was so busy chatting with the artists about their work.


These students worked so hard and were so proud of their results. They are displayed in our school's library for everyone to appreciate.

Thanks for stopping by!

Sunday, November 27, 2016

"Cat and Bird" mixed media collage


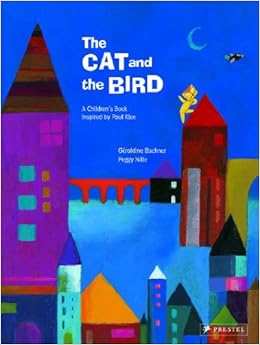
1st graders are wrapping up their studies of mixed media collages with this book, "Cat and Bird", by Geraldine Elschner.   I began the lesson by reading this book aloud to my students and then we discussed the artwork together.

https://images-na.ssl-images-amazon.com/images/I/51nck0vb8FL._SX258_BO1,204,203,200_.jpg

We used some visual thinking strategies in our talks about the landscapes in the book. My students pointed out that the cat was chasing the bird over rooftops, bridges, and that the horizon line was important in knowing where the sky was separate from the ground.

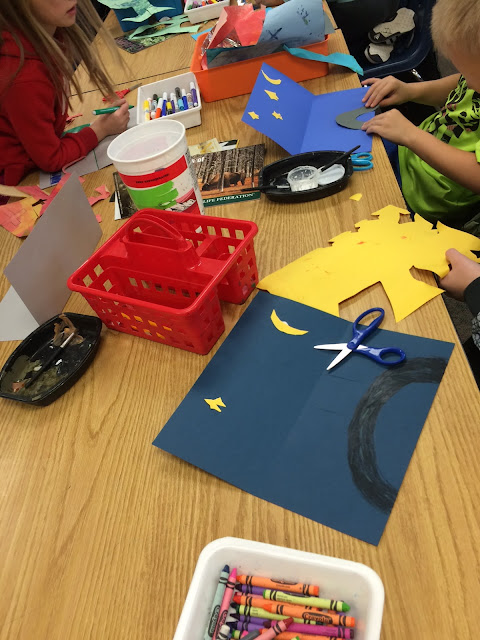
Next my students used oil pastels on construction paper to draw a horizon line and a city landscape inspired by the story. They then used geometric shapes to draw their buildings and bridges. 

On the second day they added painted paper collage details such as additional buildings and bridges. Lastly, they followed me in a directed drawing of the cat, that they then cut and glued to their compositions.
I was pleased to see that these artists were able to show me their understanding of using a horizon line in a landscape. The demonstrated their use of collage techniques as well. 


Thanks for stopping by . 

Sunday, November 20, 2016

Aerial Views of Mt. Rainier from a Plane


My 3rd grade artists have been studying landscapes for weeks. They have a solid understanding of foreground, middle ground, background, and horizon lines. I knew introducing aerial landscapes and a bird's (or in this case, plane's) eye view would make sense to them when creating their drawn artworks.  This group of artist were way ahead of the other classes, so we cranked out these beauties in one day.


I began by asking them if they've ever flown in a plane or visited Mt. Rainier. Surprisingly, a lot had!

Next, I shared images of Mt. Rainier, the highest mountain in the Cascade range of the Pacific Northwest as well as our state of Washington. This mountain has a prominent place in our school's landscape. When you exit our school, Mt. Rainier is there, gazing down on you. I knew my students would appreciate illustrating the mountain in this unique way.

Related image

Related image

Then I performed a guided drawing demonstration inspired by the aerial photographs from an airplane. They used colored pencils to finish them.

Some students asked if they could depict Mt. Rainier erupting, since it is a volcano and all, so I said go for it. I left it up to their imagination from there.  Here are some results!


Those are some risk takers right there! Check out the person on the wing!
They were really proud of their results and seemed to enjoy the process.

Thanks for stopping by!

Kindergarten Paper Form Sculptures


This was a 2 day art experience for my young artists and produced really fun results. I learned that this class was learning about 3-D forms in their classroom, so I thought it natural for them to produce them in a 3-D paper sculptures. I know this class has accelerated art skills, I knew they could handle the technical motor skills required.


We began on the first day reviewing lines and create line patterns on a rectangular paper. I then demonstrated how to bend the paper into a cylinder shape and glue it in place. I then shared how to make cuts on one end of the cylinder to create flaps. I used a flower petal analogy so they understand that these flaps should be the same size, like flower petals. Then then glued these to a base paper. They could make as many as they could in the remaining time we had in class.


The second day I demonstrated how to attach strips of paper into an X and then bend each one to join them together with glue. This would produce a sphere form. They could make as many as them wanted. I also gave them black strips of paper to use for creating attachments. They've already practiced bending, folding and attaching paper in this lesson, Lines That Wiggle.


They had a blast building these sculptures. It was really sweet to watch them help each other and share their engineering ideas. I wish I could have snapped more photos but I was having so much fun talking with them about their creations.

Thanks for stopping by!

Tuesday, November 15, 2016

Our artists on the district home page!


I was thrilled to learn that my district's photographer would be visiting my art room to capture the action of art making. Mrs. Mulcrone's 1st grade class was busy that day learning how to create a collage inspired by the book, "Stellaluna".  (They had studied bats and written a report prior to this lesson). These young artists had lots of practice creating collages before this day, so they were ready to shine for the photographer.

Here are the photographs from that wonderful day. Aren't they just the cutest? I am so proud of them. When I opened up my browser and saw the photos on the district site, I squee'd with happiness! My sweet little firsties!


Thanks for stopping by!

Friday, November 11, 2016

Pop-Up Kirigami Landscapes


The 3rd grade artists have been busy learning about landscapes in visual art.

This unit began be introducing students to key vocabulary words such as: horizon line, foreground, middle ground, and background.  We analyzed several examples of paintings and photographs in order to determine where in the imagery these terms were illustrated.

To develop their understanding of these terms, they were asked to generate a example of a landscape using blocks, clay, and other art supplies on their tables.


This was a palace landscape...pretty clever, I thought!

The next class, I shared a kirigami (art of paper cutting) technique to create a pop-up landscape. I challenged them to create a pop-up prototype landscape showing background, foreground, and a middle ground pop-up item.


This exercise was to prepare them for their final larger mixed-media pop-up landscapes. I could assess their understanding of the terms and techniques with these prototypes.

The following class the students were given their choice of colored card stock paper (a stiffer/stronger paper) for their background/foreground. I reviewed upon and encouraged them to use collage and mixed media techniques to add visual elements to communicate their landscape ideas.


Finally, they self-assessed their pop-up landscapes by determining if their work showed a landscape with a horizon line (the central fold), foreground, middle ground pop outs, and backgrounds. They also said that there should be good craftsmanship and details.


I wanted the artists to have some subject matter choices, so I was flexible with their content so long as they showed a landscape (view of outdoors). They had a lot of fun creating these, some students went home and created more!

Thanks for stopping by!