Instagram: Makeamark_artroom

Wednesday, November 25, 2015

Marker ink as watercolor

Don't throw away those dried up washable markers! They can be soaked in water to create "re-purposed" watercolor paint! I had about 24 packs of markers from last year that I just couldn't throw away. They had just enough juice in them but not enough as far as the students were concerned. I had read online (Pinterest, Cassie Stephen's blog) how to soak markers in cups of water over night to create this "marker juice" paint. So I went forth and sorted the colors, soaked them, and what I discovered was...free paint! Woo-hoo!

Soaking markers

I really like to use watercolors in the classroom but I find the primary grades tend to muck up the lighter colors by not properly rinsing brushes and the older students were less mindful about applying the paint with enough water to make it flow. Marker ink were a great way to paint with the effect of watercolor.

The more markers you soak in a cup, the brighter and bolder the color. If you want to dilute colors, just use less markers or add more water to the cup. It is so simple and is a great way to control the color's brilliancy.

The students were really amazed by how simple this was and even went home and asked their parents to help them do it with their dried up markers. Whats more is that it is washable. If it spills on clothing, hands, etc...it is easily cleaned up.

Here are some photographs of the marker ink paint in use.

3rd graders used the marker ink to mix intermediate colors.

1st grade painted Henri Matisse's "Fish bowl"

3rd grade painted Paul Cezanne's "Still life with apples"

These marker inks are a great alternative or addition to watercolor paints. They also can serve as a stepping stone to tempera painting as students learn to mix colors and handle brushes.

Tuesday, November 17, 2015

Kindergarten's "Rocket to the Moon" mixed media collage

Wow, this was a really fun project to create with the kindergarteners! The little ones had a blast so therefore this project will probably be a curriculum staple. We took two classes to complete this mixed media artwork. The kinders practiced drawing, painting, stamping, printmaking, tracing, cutting, and gluing...all in one work of art!

 
A proud kindergarten artist's finished mixed media collage.
On the first day I had set up 5 different media stations. I introduced the lesson to the kids by talking with them about circles and how we were going to make circles with all different types of art supplies. I gave the kids a tour of each station demonstrating how to use the art supplies. By time I had finished they couldn't wait to try them out. We rotated through each station about every 5-7 minutes.

Here are the 5 stations in action shown in the photographs below.

Circle stencil station. Kinders traced and colored a variety of circle sizes on their paper.

A favorite. The printmaking station. Kinders used brayers and bubble wrap to print circle dots with red and yellow paint.

Stamping station. Kinders stamped plastic cups, cut straws, and recycled plastic spools to create circles. I love to see those messy art hands!

Cut and Glue station. Kinders traced a circle stencil, cut and glued it to their work. They were also given circle stickers to add to their designs.

Painting station. Kinders painted circles and dots in various sizes with black tempera paint.


On the 2nd day in class, I read the book "Eight Days Gone", by Linda McReynolds. It is beautifully illustrated book about the US astronauts trip to the moon. The kindergarteners really enjoyed talking with me about space, the moon, and spaceships. They were fascinated with spacesuits and how they give the astronauts oxygen while in space.


After we ended our discussion I guided the students in drawing a spaceship using lines they learned back in September. We used the curve, horizontal, and diagonal lines. They added details with crayons and cut it out. Next they brought their spaceships to a separate table where they chose a couple colors to paint their ships with watercolor.
Once they finished adding all of the color, they glued their spaceships into position on their circle pictures created on the 1st day.

Here are some of their results in the photographs below.


The kids were so proud of their work which made me feel great as a teacher. I will try to create more projects like this one. I loved how we incorporated so many supplies and techniques and still allowed for creative expression. We learned about art media, space, and travel all in one project!

Thursday, November 5, 2015

Studying "Still Lifes" in 3rd Grade

As the month of November has begun, 3rd grade has been introduced to the art of "Still lifes".  They were shown a series of famous still life paintings through art history and given a simple definition of Still Life: An artwork that depicts an arrangement of human-made and/or natural objects in a setting. They took notes in their sketchbooks while we did comparisons between different styles of still lifes.

An impressionism still life painted by Claude Monet

A "Fauvist" Still life painted by Henri Matisse

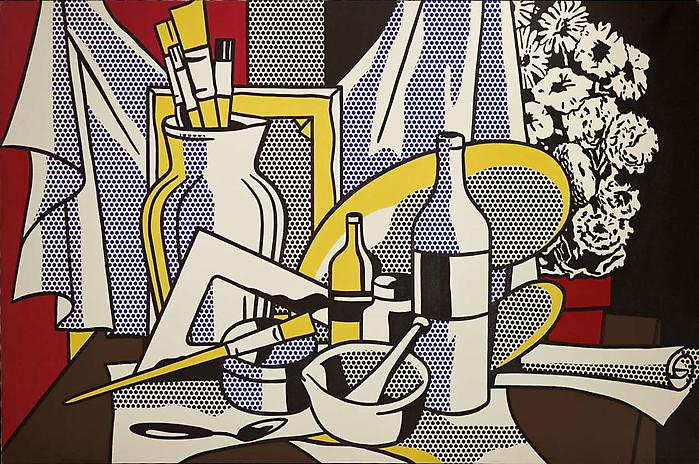
An example of a Pop Art still life by Roy Lichtenstein


A photograph still life created by Andy Warhol

The 3rd graders were asked to explain their knowledge in defining how each example was in fact a still life. This allowed me to assess whether they truly understood what qualified as a still life.

Afterward, I composed a still life of gourds under the document camera. I then asked the students to sketch this arrangement in their books. I explained that we are using observations to create the drawing rather than relying on our imagination.

We reviewed Monart's 5 basic elements of shape, size relationships, and overlapping techniques. I had the students trace the contour of the objects with their fingers in the air first to get a sense of the contour shapes. Once they felt comfortable with what they were observing, they began to draw.

Still life arrangement of gourds


Students are drawing in their sketchbooks.


3rd graders adding the color with crayons once they finished sketching.

The next class they were asked to draw other objects from observation.
 I was very pleased with the students' abilities in observing then drawing.  I like introducing this type of drawing in 3rd grade because this is the age when kids start to want to create realistic art. I leave plenty of room in the curriculum for imaginative expression but introducing them to still life art has opened up the door to begin realistically creating the illusion of space. As the year continues, we will study more techniques in communicating objects in space 2-dimensionally.